How to Replace an Electrical Outlet
Learning how to replace an electrical outlet is an easy do-it-yourself project that anyone can do.
All it takes is identifying what type of outlet you’d like to replace, purchasing a new one along with the proper tools and materials and following this simple guide.
Before you know it you’ll have a brand new outlet working and can brag to everyone you know about how you rocked it out yourself.
Identifying the Electrical Outlet You’re Replacing
The reason this initial step is needed is because you don’t want to replace your old outlet with one that isn’t compatible but don’t worry it’s easy to do.
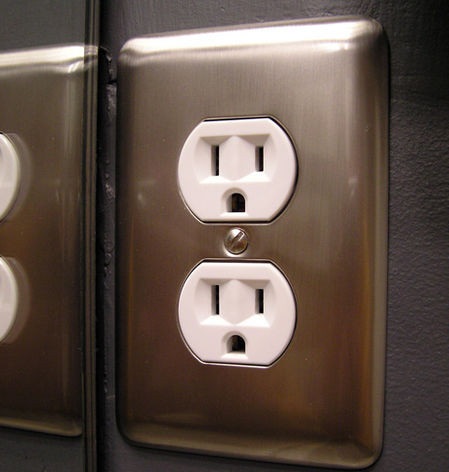
You’ll want to check to see if you have a 2-Prong, 3-Prong or GFCI electrical outlet.
Once you figure out what you’re working with simply jot that info down so you can take it with you when you buy your replacement. Now you’ll be able to easily find the perfect replacement for your old one.
So just make sure everyone is clear; you’ll want to replace your outlet with exact same type of outlet. The last thing you’ll want to do is remove a 2-Prong outlet and replace it with a ground 3-Prong outlet.
Supplies You’ll Need to Replace Your Outlet
- The New Outlet
- Pliers
- Electrical Tape
- Voltage Tester
- Flat Head and Phillips Screw Drivers
- Wall Plate (If You’re Replacing That Too!)
Steps to Replace an Electrical Outlet
Step 1: Turn the Power Off
You can do this by switching off the appropriate breaker or when in doubt or when someone hasn’t marked the location inside the breaker box, you can shut all the power off by doing it right at the main switch.
For those who plan to take the time to figure out which breaker it is, that will also be a perfect time to write it down inside your breaker box for future reference.
Use your voltage tester to make sure the power is off at the outlet before moving on to step two.
Step 2: Remove the Old Electrical Outlet
Simply remove the screw holding the wall plate on then unscrew the two screws holding your outlet into the electric box at the top and bottom of the outlet.
Next loosen the the screws on either side of your outlet and remove the wires. With any luck all your wires will be the appropriate colors such as black, white and green.
But if you do have an assortment of colors that you weren’t expecting, a good tip is to check before removing the wires, what color screws they are attached too.
If a wire is hooked to a brass colored screw it is your Hot Wire and if it’s hooked to the silver colored screw then it’s your Neutral. Your ground wire (if you have one) will be either a green wire or a bare copper wire.
TIP: If your Hot and Neutral wires are the same color, take a piece of masking tape, write the name on it and tape it to the wire until you’re ready to install the new one. Use a decent size piece so it can hang on your wire like a little flag.
Step 3: Replace the Outlet
Now we’re getting to the fun part because you’ll be almost finished!
Get that new electrical outlet out and get ready to reinstall it the same way it was when you removed it. Check your wires with your pliers to make sure they are curving like a candy cane so you can wrap them around your new screws.
Some outlets will have the wires stuck into the back of the outlet instead of wrapped around the screws, if that’s the case now would be a good time to go ahead and bend those wires so you can wrap them around the screws instead as it makes a stronger connection and is far less likely to come loose.
When you’re putting the wires back on put them around the screws so it loops around it clockwise. This way when you tighten those screws down it’ll tighten the wire down with it.
Remember the black or hot wire goes on the brass screws and the white or neutral wire goes on the other ones. Your ground wire (if you have one) will connect to the green screw on the new outlet.
Now that your wires are reattached, take a long piece of electrical tape and wrap it around the outlet so it goes over top of the screws. This is an optional step but it’s an added safety feature many professionals use to ensure those wires don’t go anywhere.
Step 4: Completing the Project
Slide your outlet back into the box and tighten down the top and bottom screws to secure it. Stick your wall plate back on and now it’s time to go turn the power back on.
Once it’s on, go ahead and check your outlet with your tester to ensure it’s live once again. If everything is working fine, grab something to plug into it and check out the awesome job you just did because you just saved yourself a $100 service call!
As always if you feel very uncomfortable doing a project like this, play it safe and contact a licensed electrician.
If you have any questions in regards to replacing your electrical outlet, feel free to leave them in the comments below. Let us know how it goes!