Governor Cuomo Unveils Texting Zones

Don’t worry you didn’t read it wrong. Governor Cuomo stepped outside today for a press conference announcing the new Texting Zone signs!

What’s a texting zone sign? Silly you, it’s a sign that points out that you can use the already existing rest areas and parking spots on New York’s major highways as a place to pull over and text till your thumbs bleed.

If you’re wondering if these spots didn’t already have signs indicating that they existed, well they did. Every exit and rest area already had a sign acknowledging their presence and how far away they were. Seems odd right? Well you must not be from New York.

New York like many other states have made it illegal to use your cell phone while driving and that includes texting but apparently so many people didn’t listen to these new laws that now the people need shiny new blue signs to make sure they know.

Now when traveling thru New York State you can enjoy signs pointing out that, that text message can wait and that you’re only a few miles from a place where you can check out those tweets and text messages, in case you didn’t realize.

But hey on the bright side besides the inflated cost of making these changes that comes right out of your paychecks every week, I’m sure it will do some good especially for the 16 to 21 year old crowd, some of which have difficulty understanding what common sense is.

I for one am not surprised in the lease considering New York is the home of potential soda size bans and other ludicrous ideas brought forth by politicians. Thankfully giving people a reminder that they can text in a rest stop is no where near as bad as a politician trying to tell you what size beverage to enjoy.

So long as they don’t start trying to put a cap on what size french fries I order, I like many others will be able to deal with these new texting signs. Thanks Governor Cuomo for the heads up but please don’t try to touch our fries!

What do you think of these nifty new text messaging signs?

Image via Flickr

Becoming a Stay at Home Dad

If you had told me when I was 21 that in just a few short years I would be giving up work and becoming a stay a home dad, in order to look after a baby full time then I would have laughed in your face.

But as fate would have it that was the direction that my life would actually take. And while at first I was a bit unsure about becoming a stay at home dad. I mean after all being a stay at home dad is still seen as being weird by some small minded people out there, but now I am so glad that I had this opportunity.

I count it as a blessing and I want to share this with you guys who may be about to travel down the road of being a stay at home dad just like I did. Now first thing I want to say is that if I can be a stay at home dad than you can. I honestly had zero experience when it came to looking after babies and I managed just fine. So if I can do it, so can you.

The reason I became a stay at home dad is the same reason I am sure some of you will be and that is money. My wife made a great deal more money than I did so it made no sense what so ever for me to go and work for far less money than she would make, so it was decided I would be the one to stay at home.

So let me share a couple bits of advice that served me well during my tour of duty as a stay at home dad.

Stay at Home Dads Need to Go Out And About

Do not stay in the house all day or you will go insane!!! Go out for walks, I cannot stress this enough. I live in the UK where it rains 99 percent of the time, but if you have some good rain gear and a few blankets then your baby will be a snug and warm just as if he or she were in bed. It’s a great way to clear your mind and the motion of walking may even help your baby sleep which is always a blessing.

Becoming a Stay at Home Dad: People Act Weird

There is nothing wrong with becoming a stay at home dad. If people think it’s weird then they are the ones with the problems, but it can still be quite hurtful when you tell someone you’re a stay at home dad and you get that “oh that is great” half hearted response and you can just tell they are judging you.

This will happen to you at some point so just remember that they are the ones with the problem not you. But I know from personal experience how this can get you down. You just have to try and shrug it off the best you can.

Try Not To Rub It In

What I mean by this is that your wife or partner who is at work all day will no doubt be missing the baby like crazy and wish they could change places with you. So while you will want to share with her every little thing that he or she did make sure you are considerate of her feelings. It can be very hard for a mom to have to go back to work and leave her baby at home. So always take that into consideration and make her feel like she is still involved.

Enjoy It

This is the best piece of advice I can give you stay at home dads to be. I really cannot stress enough how lucky you are. Just think of all the firsts you are going to get to witness that you would have missed if you had been at work. I am not saying it’s easy by any means, but the good by a ton outweighs the bad.

Also remember that you are one the first in a whole new generation of stay at home dads, you’re breaking the stereotypes and showing that men can be loving and caring individuals to their children just like women were always expected to be.

So don’t let the naysayer’s out there keep you down, be proud of who you are and remember it’s for your child’s best interest and that’s all that really matters. I hope this article will help you with your own journey towards becoming a stay at home dad and I look forward to reading your comments.

If you have any questions or concerns about the transitions feel free to let me know and I’ll respond in a jiffy.

Huma Abedin Takes Hillary’s Relationship Advice

Huma Abedin has taken plenty of heat over the sexting scandal that plagued her husband, Anthony Weiner.

But being a long time aide and personal friend of the Clinton’s she has gracefully taken notes from Hillary’s own prior fidelity problems that plagued her own husbands career.

Hillary Clinton showed the world that you can get through those tough times with an unfaithful husband and turn things around for the better, not every marriage has to end in divorce.

I’m sure Huma has thought about divorcing Anthony plenty of times but she has seen the progress made by the Clinton’s having been working along side Hillary since 1996, believe it or not.

Both of these women are champions for the progress of women and that includes proving that they can stand by their men through even the toughest of times, which should be commended.

Hillary and Huma Should Be Commended

Even though recent studies have shown that women are far more likely to have affairs, these two women prove that not only that they can stay extremely faithful but that they can stomach, handle and grow from their own husbands affairs without sinking as low as they did.

Not many media outlet have reported on this but it’s about time one of us does! Hillary and Huma both show the charisma, grace and level of forgiveness all women should possess especially during difficult times such as affairs and even sexting.

Not to mention when you have children involved, professional careers and a life in the spotlight it only makes things such as these more difficult to deal with. Imagine how many times both of them have wanted to run away in the midst of the public humiliation but instead of buckling they stood up tall and showed women worldwide exactly how it should be; that marriage is a lifetime commitment.

So don’t feel bad for them except for the fact that such beautiful women had to deal with such situations because they are right where they’ve always wanted to be their husbands true life long partners regardless if they are perverts or have been accused of being serial rapists. Thank you from women everywhere!

How do you feel about it? Could you stand by your man the way these two strong women have?

Simple Cucumber Raita Recipe

If you’re a fan of Greek or Indian dishes than you have to learn how to make this simple Cucumber Raita recipe. Not only will you love us for it but your friends and family will think you’re a culinary guru.

The Cucumber Raita recipe is really easy to make but the flavor is tremendous. We’re sure you’ll find tons of different ways to incorporate this into your meals.

For those of you who love spicy food but at times find yourself thinking it’s a tad to hot too handle, this is a great little side to have so you can cool things the hell down.

Cucumber Raita Recipe

Serving Size: 6-8

Ingredients

1 English Cucumber

1 Cup of Greek Yogurt

1 Small Tomato

1/4 Teaspoon of Cumin

1/4 Teaspoon of Chili Powder

1 Tablespoon of Lemon Juice

Salt and Pepper to Taste (1/8th Teaspoon)

A Pinch of Sugar


Preparation

Get all those ingredients out and let’s do this! Start with your cucumber, peel it and grate or slice it extremely thin so it can mix well without being to clumpy.

Wrap it up in some paper towels to get all of that moisture out, give it a squeeze if it’s really juicy. Sit that aside and lets keep moving.

Now go ahead and dice up that tomato nice and small. Believe it or not you’re already close to finished!

Grab yourself a mixing bowl and toss all your other ingredients into it starting with the yogurt so all the goodness can stick to the top of it. Mix all of that up until it’s nice and smooth.

Finally take your cucumber and tomato and add it in to mix thoroughly. Once you’ve completed that step simply cover and place it in your refrigerator to chill out for about a hour or if you don’t want to wait, just dig in and enjoy!

There you have it, a simple and quick Cucumber Raita recipe.

7 Tips on How to Rock Leggings


Do you love leggings as much as I do? If so check out these 7 tips on how to rock leggings like you have a stylist. Leggings have become a fashion staple that has caused trends on both the runway and the streets. And it’s no wonder!

The wonderful things we call leggings are the ultimate combination between comfort and style, and are constantly evolving as designers continue to look for ways to reinterpret them. From metallic to lace to denim looks, it’s easy to feel overwhelmed by all the options available. Here are the 7 basic tips on how to wear leggings.

How to Rock Leggings

  • Lengthy tops are best with leggings. For shorter tops, consider a skirt or shorts over the leggings. Either way, your behind should not be showing!
  • Avoid tight clothing because it may look too severe and, in some cases, you could be mistaken as being in the middle of a workout when you’re actually not.
  • Be sure to buy the correct size or you may risk unwanted bulges! Ideally, they should fit comfortably at the waist.
  • Look for opaque tights rather than sheer ones, as the latter can look like pantyhose instead.
  • When choosing colors or styles, match them accordingly to the rest of your outfit. For example, if your top is colorful or beautifully embellished, compliment them with simple black leggings. For subtler tops, experiment with bold colors or exciting designs.
  • Pumps, flats, and boots (whether of the thigh-high or the ankle kind) are the perfect footwear to complete your look. Pair calf-length leggings with flats and for longer leggings, wear them with pumps or tuck them into boots.
  • Matching the color of your leggings with your shoes can also make your legs look longer. Likewise, too many colors will divide your leg and make you seem shorter.

Use these 7 tips on how to rock leggings and I guarantee you’ll never have problems pairing them up perfectly before you head out the door.

Constitution Day Drink the American Beauty

Did you realize that September 17th was also Constitution Day and Citizenship Day? As far as I’m concerned every holiday is another excuse to have some drinks.

So we’ve brought you a new mixed drink recipe that will have you talking constitutional non-sense, half slurred, all night long. This drink is called the American Beauty.

How to Make the American Beauty

Whipping yourself up this mixed drink isn’t that difficult at all. So put on your favorite American Flag bandana (optional) and get to sipping.

Ingredients:

  1. 1 Shot of Brandy
  2. 1/2 Shot of Dry Vermouth
  3. 1 Shot of Orange juice or Lemonade
  4. 1/4  Teaspoon of Creme de Menthe
  5. 1 Teaspoon of Grenadine
  6. 1/2 Shot of Port Wine
  7. Ice Cubes

Preparation:

In a shaker or big glass, add your ice cubes and all your other ingredients except for the Port Wine. Once you have done that, go ahead shake it up or if you don’t have a shaker just stir that thing really damn good.

Transfer the combined ingredients into your drinking glass and then finish it up by slowly and gently pouring the Port Wine across the top of the other liquids.

That’s all there is to it. Now you can start getting skunked on Constitution Day aka Citizenship Day with some fine tasting American Beauty mixed drinks.

Make Your Own Homemade Pasta by Hand

How many times have you wanted to make pasta at home but got scared off?

You can stop hiding now because from today forward you’ll know exactly how to make your own homemade pasta by hand.

To use this pasta making technique you won’t need any fancy rollers or pasta making machines at all, you’ll just need a few key ingredients, a little bit of time and your trusty hands.

Best of all it’ll only take you 10 minutes using this method and you’ll be dropping those noodles into the water before you know it.

Another great perk of making your own homemade pasta is that you can change the recipe, like for example you can use wheat flour as opposed to white and make it healthier from the start.

Make Your Own Homemade Pasta the Old School Way

Ingredients

  1. 2 Cups White or Wheat Flour or Both
  2. 1 Egg
  3. Olive Oil (Optional)
  4. Fork
  5. Hands

Pasta Making Time

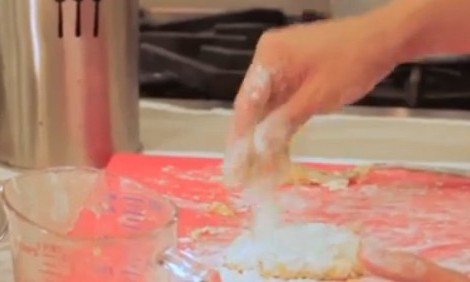
The first thing you’ll want to do is take your two cups of flour and dump them into a mound on the work space in front of you. Make them into a nice little volcano like mound and then use your fingers to open up a hole in the top of it.

Now go ahead and crack your egg into a mixing bowl or cup along with a drizzle of olive oil if you’d like. Mix those two together till they are combined.

This is the part where you’re going to dump about half of your egg and olive oil mix into the hole you created in your flour mound. Next take your fork and begin to mix around your egg mixture while it’s in the flour. Keep mixing until you get a fairly gooey ball of dough.

Now grab up of your dough ball and push the remaining flour to the side. Are you ready for the fun part?

Take take gooey dough and place it back on your work surface and push it down with the palm of your hand a little bit. You’ll notice that it is awfully wet so sprinkle a little flour over it and push it down once again.

What you’ll want to do now is push it down a bit so it spread out some and then begin folding the sides in on itself, turning the dough as you do it. So you’ll push down, fold the two sides in, push down again and continue turning and repeating the process until it firms up to that familiar dough consistency.

Along the way you may find you’ll need to add more flour as you work the dough so go right ahead and add some in the midst of your folding fun.

Get Ready to Cook the Pasta

Sit the dough aside while you get your water boiling, which will take just enough time for you to finish your homemade pasta.

Grab up your rolling pin and with your hands on the pin itself, roll out your dough until you reach the point that you can actually see your hand through the pasta. Don’t roll it out like a pizza dough but rather in more of a long rectangular shape simply by working the pin back and forth.

Once you’ve done this, fold the dough in half on itself and use a sharp knife to cute the noodles to the width that you desire.

At this stage your water should be just about boiling and ready for you to drop that homemade pasta into the water. So there you have it! You just made your own homemade pasta by hand.

TIPS

Add an extra egg yolk for more “pasta” coloring.

You can keep fresh pasta in your refrigerator for about 3 days.

If you dry out your homemade pasta it’ll last for up to 3 months!

Watch the Step by Step

Restaurants Dealt Another Blow with Tax on Tips


Restaurants are dealt yet another blow by the government and this time it’s not just about Obamacare it’s about taxes on tips. Ironically enough right after the industry began voicing their concerns over the effects of the new health care reform bill, out comes another change aimed directly at the food industry.

A recently updated tax change has left many restaurant owners scrambling to make changes before the new tax rule fires up in January.

The New Tax Change on Automatic Tipping

Typically when a large party dined at a restaurant there would be an automatic tip calculated into the cost of the meals as a way to ensure the server would get a fair tip after spending all the extra time and effort taking care of their customers.

What has happened is the IRS is now classifying automatic gratuities as a service charge rather than just a standard tip. What this does is now make it so these tips would need to be included in a servers paycheck rather than collected by them at the end of their shift. That correlates into more paperwork for the business owners, a more complicated payroll and of course a death blow to the servers that depend on those tips to get by.

Why target a group such as the wait staff at restaurants to bilk more tax money out of?

Similar to the steps mass amounts of restaurants are taking in regards to Obamacare which is the slashing of employee hours so they don’t meet the threshold for healthcare coverage. Now restaurants are beginning to remove the automatic tip added to those tabs.

Could there be a connection between the two? Is perhaps the government trying to find a way to make it so those restaurants, that are cutting employee hours, will have to factor tips into the staff’s hourly wage?

If they are, it was a bad move because industry experts are figuring the majority if not every restaurant in the U.S. will remove those auto-tips before the change even takes place.

Not every waiter or waitress is lucky enough to work at a high end restaurant in NYC or Chicago and that should be factored into the equation. Many of these servers are barely getting by and figuring out ways to tax them higher, when they are already getting paid less than minimum wage is absolutely absurd.

We need to be a country that encourages and promotes business ownership as well as fair pay for employees not one that tries to weasel more and more tax money from not just business owners but the employees that work for their companies.

The wait staffs across the country already deal with ignorance, arrogant rude customers and having to handle plates covered in people’s have eaten food as it is. Why now try to stuff your hands into their cookie jar?

Unfortunately servers are rallying behind restaurants move to remove the automatic tips before the tax changes take place. It looks like they will have to deal with getting stiffed by a percentage of those large groups that they wait on instead.

So with that said, how do you feel about automatic gratuities and these changes that are on the horizon?

The Beautiful Image Above is by Alan Light

How to Replace an Electrical Outlet

Learning how to replace an electrical outlet is an easy do-it-yourself project that anyone can do.

All it takes is identifying what type of outlet you’d like to replace, purchasing a new one along with the proper tools and materials and following this simple guide.

Before you know it you’ll have a brand new outlet working and can brag to everyone you know about how you rocked it out yourself.

Identifying the Electrical Outlet You’re Replacing

The reason this initial step is needed is because you don’t want to replace your old outlet with one that isn’t compatible but don’t worry it’s easy to do.

You’ll want to check to see if you have a 2-Prong, 3-Prong or GFCI electrical outlet.

Once you figure out what you’re working with simply jot that info down so you can take it with you when you buy your replacement. Now you’ll be able to easily find the perfect replacement for your old one.

So just make sure everyone is clear; you’ll want to replace your outlet with exact same type of outlet. The last thing you’ll want to do is remove a 2-Prong outlet and replace it with a ground 3-Prong outlet.

Supplies You’ll Need to Replace Your Outlet

  • The New Outlet
  • Pliers
  • Electrical Tape
  • Voltage Tester
  • Flat Head and Phillips Screw Drivers
  • Wall Plate (If You’re Replacing That Too!)

Steps to Replace an Electrical Outlet

Step 1: Turn the Power Off

You can do this by switching off the appropriate breaker or when in doubt or when someone hasn’t marked the location inside the breaker box, you can shut all the power off by doing it right at the main switch.

For those who plan to take the time to figure out which breaker it is, that will also be a perfect time to write it down inside your breaker box for future reference.

Use your voltage tester to make sure the power is off at the outlet before moving on to step two.

Step 2: Remove the Old Electrical Outlet

Simply remove the screw holding the wall plate on then unscrew the two screws holding your outlet into the electric box at the top and bottom of the outlet.

Next loosen the the screws on either side of your outlet and remove the wires. With any luck all your wires will be the appropriate colors such as black, white and green.

But if you do have an assortment of colors that you weren’t expecting, a good tip is to check before removing the wires, what color screws they are attached too.

If a wire is hooked to a brass colored screw it is your Hot Wire and if it’s hooked to the silver colored screw then it’s your Neutral. Your ground wire (if you have one) will be either a green wire or a bare copper wire.

TIP: If your Hot and Neutral wires are the same color, take a piece of masking tape, write the name on it and tape it to the wire until you’re ready to install the new one. Use a decent size piece so it can hang on your wire like a little flag.

Step 3: Replace the Outlet

Now we’re getting to the fun part because you’ll be almost finished!

Get that new electrical outlet out and get ready to reinstall it the same way it was when you removed it. Check your wires with your pliers to make sure they are curving like a candy cane so you can wrap them around your new screws.

Some outlets will have the wires stuck into the back of the outlet instead of wrapped around the screws, if that’s the case now would be a good time to go ahead and bend those wires so you can wrap them around the screws instead as it makes a stronger connection and is far less likely to come loose.

When you’re putting the wires back on put them around the screws so it loops around it clockwise. This way when you tighten those screws down it’ll tighten the wire down with it.

Remember the black or hot wire goes on the brass screws and the white or neutral wire goes on the other ones. Your ground wire (if you have one) will connect to the green screw on the new outlet.

Now that your wires are reattached, take a long piece of electrical tape and wrap it around the outlet so it goes over top of the screws. This is an optional step but it’s an added safety feature many professionals use to ensure those wires don’t go anywhere.

Step 4: Completing the Project

Slide your outlet back into the box and tighten down the top and bottom screws to secure it. Stick your wall plate back on and now it’s time to go turn the power back on.

Once it’s on, go ahead and check your outlet with your tester to ensure it’s live once again. If everything is working fine, grab something to plug into it and check out the awesome job you just did because you just saved yourself a $100 service call!

As always if you feel very uncomfortable doing a project like this, play it safe and contact a licensed electrician.

If you have any questions in regards to replacing your electrical outlet, feel free to leave them in the comments below. Let us know how it goes!

Owning a Franchise Business: The Downsides

A franchise business? How could that be a bad choice? Unfortunately behind the brand recognition hides some ugly truths that show the downsides of owning a franchise business.

Anyone who has considered opening there own business has most likely at some point considered jumping into a franchise business model. With all the hype and supposed ease of a turnkey opportunity, it can become very attractive to those who aren’t well versed in the arena.

You see the thing is the hype and sales pitches are exactly that: there to lure you into how easy it can really be to own your own business! Just pay this small franchise key and start rolling in the money! Well it’s certainly true that some franchise fees can be as little as $10,000 but most of them aren’t even well known enough to gain the benefit of brand recognition.

So to get the perks of the big brand name you’re more likely to have to shell out 50, 75 or even more than $100,000 and that’s just the franchise fee.

What Do You Get for Paying a Franchise Fee

Now this may come as a shocker to many but all you get for that franchise fee, get ready for it, is the right to use their brand new in a given market!

That’s right, you don’t get a custom built building, a warehouse full of supplies or even a name tag sporting their logo on it. Please do not get it misconstrued, not all franchise opportunities are bad and there are definitely so times where owning one is the best option you can get but tread very lightly because if you’re not in that situation you may want to reconsider.

So Now Do I Get to Start My Franchise Business?

Sorry in advance for the let down but no you don’t. Next you’ll need to locate an existing property or have one custom built from scratch to the specifications of the parent company.

So if you were thinking of a great old building to pop that burger joint into, you’ll have to guess again. The corporate structure is one of replication and structure, in other words it has to be their way or not at all. This is an area many would-be franchisees over look in their planning. They dive in, pay that franchise fee and don’t realize they will most likely need far more capital than they had prior to paying the fee. Mostly like the costs after the franchise fee will far exceed that cost.

Pulling from personal experience, some years back a friend of mine decide to open a franchise of a popular sub sandwich shop. Needless to say he got in cheap and paid under $35,000 for the franchise fee, unfortunately it ended costing him the remortgaging of his house to renovate the space for the business which came in at a total of over $150,000.

He indeed went through the process and swallowed the huge amount of debt, but what did he get out of it? Currently he is making about $30-$40,000 a year in net profits. You’d expect a lot more, don’t you think?

I Paid the Franchise Fees and the Building Costs!

At this point you figure you’re in the clear and it’s time for money making! Time to cut costs where they may need it and get increasing that profit, right? Wrong! Part of the franchise agreement also requires you to only buy supplies and promotional materials from the company themselves (another cash cow for them).

You can’t serve with a different tray, different cups or even a different advertising campaign. You’re now part of their system and the only option is to abide by it. That’s another downside of a franchise business, aside from the astronomical costs, you do not gain the personal freedoms that come with being a business owner.

In essence you paid all of that money for the brand recognition and to become a general manager of a location of theirs. Of course you do get that net profit though after all expenses are paid, just don’t forget the company has to be paid a yearly percentage as well. Did you think the franchise fee was all they would want? Not at all!

They expect you to pay them every single year you’re in business and it never ends. 40 years into owning it and you’ll still be paying the price. As you can see, there are certainly a plethora of downsides to owning a franchise business but it can still be a great opportunity for some.

Who the Hell Would Want a Franchise?

The ideal franchise business owner is the type of person who simply wants to own a business but doesn’t necessarily have the personal passion of owning a business. Lets say for example that you just retired from your job and have a pile of retirement money waiting to be burnt through to try to extend it and hopefully add more to it.

You don’t necessarily have a vision for a business or any certain idea or trade that is your dream you wish to make come true. Put simply you just want to manage a business and get a chunk of the profits. You’d be a prime candidate for a franchise business. If structure, similar to that of a corporate job or that of a general manager is the working situation you excel at then you’d also be a great potential owner.

Another great personality type for a franchisee is the type of person who loves to work hard regardless of what it’s on and through their dedication solely, reap the rewards. On the other hand if you are a true blue entrepreneur with a vision and a passion for a certain product, service or idea, than you’ll probably drive yourself to the brink of insanity working in the franchise business world.

So before any of you dive on into investing that savings or pulling that monster loan to get yourself a franchise, analyze exactly what it is you want out of owning your own business and what is important to you. Doing so will save you a lot of money, frustration and time all wrapped up into one sweet little package.

How to Remove an Old Window

Thinking about replacing those old wood frame windows? Learn how to remove an old window like a boss with these easy to follow directions and of course a lovely video to go along with them.

Preparing to Remove the Window

Make sure before hand you have everything you need to replace the window before you get started. There’s nothing worse than needing to run to the hardware store because you forget screws or caulk.

To make the removal as easy as possible get the following supplies situated before you start the window removal process. There are other ways around it if you don’t have them all so don’t worry.

Removal Supplies

  • Pry Bar or Chisels
  • Sawzall or Hand Saw
  • Hammer
  • Plastic or a Trash Bag to Lay on the Floor (Save the hassle of all the mess!)

Now that you have your tools ready, you’re ready to get started!

How to Remove That Old Window

Step 1: Remove Any Outside Trim

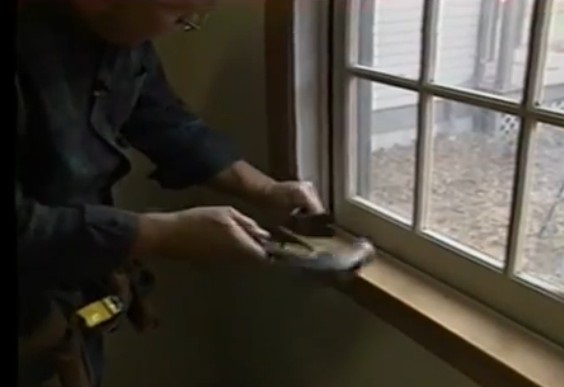
To do so use your pry bar or chisels as a wedge to separate the trim from the house. Break out the hammer, give it a few taps to get it in there and begin to slowly pry it upwards and out. Please note that you should work your way up or down the trim so you don’t break or split it in half.

Step 2: Remove the Inside Molding and Trim

Similar to the step above, you’ll want to use the methods to remove any interior trim that will be blocking your access to the frame of the window.

Step 3: Detaching the Window from the Rough Opening

This is the part where your Sawzall can come in really handy. Use it to cut down the outside of the window frame between the studs, it’ll cut those nails right in half like it’s a hot knife through butter.

However if you don’t have one you can use a specialty handsaw that is made to cut metal. Another method that is a bit more of a hassle but works if your lacking on tools is removing the nails themselves to old fashioned way.

Considering you can see the frame with the molding removed, use a flashlight or simply feel around and find where the nails are located, then move unto to ripping those suckers out with your trust hammer. It may cause some damage to the wood but hey you’re removing it anyway!

Final Step: Remove the Sashes and Frame

With the molding and window stops (if you had them too) removed you can now slide down and pop out the sashes. Getting those out of the way now will make the rest a piece of cake.

With the sashes removed you can simply push the frame straight out if it’s not stuck in there but if you run into trouble simply cut the window sill in half and just pull the sides in towards you, you’ll find you can now easily remove the entire remaining window unit. Now it’s time to install the new window!

Watch this great video by Ask the Builder to see how it’s done in live action!

White House Says OK to Recreational Marijuana

Well it’s about damn time! The White House has finally done something right for a change and said OK to recreational marijuana. As of today the government has opened up the doors for states to handle their own regulating of marijuana even if it is still against federal law.

So everyone in the states that have already approved it can let out a huge sigh of relief and well the rest of us can keep closet toking until the day it reaches all of us. Marijuana Advocates are proclaiming this is a victory towards the future abolishing of all unjust marijuana laws.

The White House’s View on Recreational Marijuana

The White House along with the Justice Department have broken it down to 8 areas in which prosecution against marijuana will take place in those states who have legalized it. Those regulations apply to areas such as the following:

  1. Selling to minors
  2. Distributing across state lines
  3. Funneling money to other criminal organizations
  4. Growing on public and/or government property

It seems as if the Justice Department and the White House are finally starting to handle a situation in a way that truly reflects the will of the people. After all when the majority of U.S. citizens are for the legalization of marijuana, one can only ask; Why the hell did it take so long?

We live in a country where things are supposed to be done based upon a majority rules basis and it seems as if the servants we pay to work for our desires often forget that it’s not about their personal belief systems it’s about what WE want.

Bring on the Haters and Tight Asses

The only person that has truly spoke out on the issue is (cue the tight asses sporting tighty whities, out of touch ideals and bad breath), Senator Chuck Grassely of Iowa and Kevin Sabet, a moron who co-founded Smart Approaches to Marijuana. The out of touch senator comes at no surprise but Sabet, come on now, do you really feel good about fighting the power against marijuana?

Why not focus on something actually dangerous like crack or meth. Oh yeah that’s right, he might get his face chewed off by some tweaking meth-head. That’s far to dangerous for a man of his caliber.

The Road Ahead

All in all though the support of legalizing recreational marijuana is only going to continue to grow and the government needs to realize the generation that is currently 80, 90 and 100 years old can only support their ignorant bullshit for so long. All of us in the younger generations aren’t so keen on putting up with your arrogant, self-righteous methods of operating.

Legalizing marijuana could truly do so much good for this country when you consider the how many wouldn’t end up in jail over an ounce of marijuana, the blow it dish out to drug cartels and the fact that more people smoking or eating it would definitely equate to a calmer more civilized society.

So consider this a win for marijuana and another move towards the removal of marijuana from the same class of drugs as heroin and complete legalization; the ultimate victory.

Ingredient Conversion Chart: Fresh vs Dry

I don’t know about you but I always find myself wondering how much of a dried ingredient or spice I can use in place of a fresh one and vice versa. For that very reason I got the approval to go ahead with a giant conversion chart for all those instances.

It gets to be a big pain in the ass when you have to keep searching for how much one clove of fresh garlic is equal to when using garlic powder for example. Now this will be an on going battle so feel free to join in. Post any of your most common spice and ingredient conversions in the comments and I’ll make sure to add it to our master list.

So in the future none of us will need to search endlessly for the answer. So remember to bookmark this and of course share it with your friends who love to cook!

Fresh to Dry Ingredients and Spice Conversions

A safe method of converting herbs and spices from fresh to dried is by using the following ratio:

1 Teaspoon of Dried or Powdered is equal to 1 Tablespoon of Fresh.

Now on to the list!

Garlic is one of the most popular ingredients used to enhance the flavor of endless amounts of dishes. Now you can convert fresh to powdered garlic with ease.

  • 1 Small Clove = 1/8th Tsp.
  • 1 Medium Clove = 1/4 Tsp.
  • 1 Large Clove = 1/2 Tsp.

Ginger which is known for it’s spicy and pungent flavor is another culprit when it comes to finding yourself with none of the fresh stuff on hand.

  • 1 Tablespoon of Fresh Ginger = 1/2 Tsp. of Ground

Nutmeg has been described as everything from sweet to spicy and everything in between but one thing that is easy to understand is the conversion between fresh and ground. Many may know this one but it’s better safe than sorry, so it’s on the list!

  • 3/4 Tsp. Freshly Grated = 1 Tsp. of Nutmeg Powder

Onion is an essential ingredient in so many dishes but how many times have we been in the midst of getting a recipe going and then… BOOM! — no onions around. In a pinch just substitute the good ole’ onion powder for the real thing.

  • 1 Small to Medium Onion = 1/2 to 1 Tsp. of Onion Powder

Parsley the herb that always pops up when you least expect it and when it does many of us find ourselves without the fresh stuff if at all! Now so long as you have some dried parsley on hand you can simply substitute it for the fresh. It may not be as vibrant but it does the trick when it comes to flavor.

  • 1 Tsp. of Dried Parsley = 1 Tablespoon of Fresh Parsley

More Updates Coming Soon! Post Your Suggestions Below!

Do You Need a Business Lawyer for Your Startup

So you’re ready to fire up that new startup and now you’re wondering if you need a business lawyer before you even get started. Well don’t fret about it to much because it’s a question all new entrepreneurs ask themselves in the beginning stages.

Fortunately under most circumstances you can forgo that costly lawyer and focus on getting that business off the ground.

Of course there are circumstances that you definitely would want a business lawyer from the get go such as anything deal with patents, your own doctors office or shall we say higher risk endeavors but if you’re getting into those type fields, you should already be expecting the need for an attorney initially.

But for those of you looking to start a laundromat, launch a website or open a small restaurant need not milk your startup capital dry so soon. You’ll probably find the majority of your work will be looking up information from the IRS, local chambers of commerce and of course the codes department and zoning boards. All of which you can easily do yourself.

Utilizing Free Resources Instead of Business Lawyers

Launching a company can seem overly confusing as much as it is exciting but do no there are plenty of people and resources ready to help.

For one the Small Business Administration is an absolute wealth of knowledge as is their SCORE program, both of which are a must for those looking to get started.

The thing that is nice about SCORE is you can actually get in touch in person, telephone or via email with people who have worked in your industry or even had companies of their own in the same field.

Not only is it free but these are fellow entrepreneurs that get as excited about new ideas as you do, so they are eager to help you succeed.

Those two sources plus the IRS website should load you up on more than enough information to get you moving and down the road as you become more established then it’ll become a GREAT idea to look into hiring up the services of a competent business lawyer.

The one thing you’ll certainly find out on your path to business ownership is that there is only one way to truly learn and get things rolling and that’s to jump on in and get started.

Cocktail Sauce Without Horseradish Recipe

Get ready for a super simple recipe for cocktail sauce without the horseradish. This is a great option for those of you needing to whip up a homemade cocktail sauce in a pinch or simply don’t like the heat of that horseradish.

Trust us we feel for all of you who get heartburn from the heat of that stuff, sometimes even those of us who usually don’t, still end up breathing fire after eating too much.

No matter what your reason is this homemade recipe is a perfect way to make up a batch when you don’t have on hand.

Cocktail Sauce Without Horseradish

Serving Size: 8-10

Ingredients

  1. 1 Cup of Ketchup
  2. 1 Clove of Garlic or 1/4 Teaspoon of Powder (Optional)
  3. 1/2 Teaspoon of Sugar
  4. 1 Tablespoon of Chili Powder
  5. 1 Tablespoon of Lemon
  6. 1/2 Teaspoon Each of Salt and Pepper
  7. For Extra Kick Add a Dash of Tabasco

Sauce Preparation

Get ready for the easiest cocktail sauce recipe ever! Go ahead and combine all the ingredients into a bowl.

If you’re using fresh garlic make sure to absolutely mince it so it’s extra fine, no one wants to bite down on a fat chunk of garlic (well maybe some of us). Stir together your ingredients, if you have a whisk go ahead and use that because it works great.

Once all your ingredients are mixed thoroughly, give it a taste and you’re all ready to go! It’s as simple as that and you have yourself a homemade cocktail sauce minus that fiery horseradish.

Once you’ve tried it out, let us know what you think or if you have a better recipe please share it with all of us!

How to Choose a Dress That Looks Good on You

All of us ladies know that having that one perfect yet simple dress is our wardrobe is a must have so long as you know how to choose a dress. That last thing any of us want is to walk outside thinking we look fabulous and in reality look like a hot mess.

There is nothing worse than not feeling confident in something you wear, so knowing how to shop according to your body type is a much needed skill in the arsenal of awesomeness.

For those of you who don’t know how to do this, no worries because I’m going to explain how to choose a dress that’s perfectly complimentary to your shape and will leave you feeling like the beautiful swans that you all are. No more ugly ducklings round here!

Step 1: Identify Your Body Type Before Buying a Dress

Most women fit into one of the following different body types:

  • The Hourglass (We all know what this looks like)
  • The Pear Shape (Think of a pear; small at the top and juicier at the bottom)
  • The Apple Shape (Bustier Gals, Broader Shoulders and Torso)
  • The Smartphone (Okay I made this one up but it’s for rectangular shapes)
  • The Circle: (For those of us with a midriff that attracts weight like a magnet)

Now go ahead and check yourself out, decide which category your body falls into and get ready to turn up those dress shopping skills!

Final Step: Choose Dresses That Work for Your Shape

I know you’re probably wondering where the heck the information on that is but don’t worry here it comes. The key to this is choosing styles that work for you and avoiding those that don’t at all costs! Now on we go to learning how to choose a dress like a pro.

The Hourglass

You have by far the easiest and most sought after shape due to how simple it is to pick flattering outfits that will work with your body type.

Due to your naturally wonderful genetics you’ll be able to indulge in all sorts of styles from form fitting and corseted looks to strapless dresses and flare out comfortable styles that are perfect for spring and summer especially.

The only thing you might want to steer clear of are those overly beaded, rhinestone covered, heavily decorated dresses due to the fact they may make you seem much heavier than you may want.

The Pear Shape

As a woman with a smaller top that leads to fuller hips you have a shape that is quite common and very easy to dress. Your focus will be on dresses that enhance your top while drawing the eye away from your hips.

To accomplish this go for dresses that a flare from the waist down and unlike those with the hourglass shape, you can rock those choices with embellished tops which will in turn fill out the top to bring you more into perfect proportion with your lower half.

Another great tip is to try on some two tone options that have a darker bottom and a lighter top. Not only as these cute as can be but they also keep those eyes up top instead of the area you are working to even out.

The Apple Shape

Although this body type is the hardest to dress, it’s about to get a lot easier! Whether you are trying to counteract that big bust, draw attention from your shoulders or even hide away that post-pregnancy belly, these tips will work for all those situations.

For starters stay away from those tiny cap sleeve options, ultra clingy fabrics and dresses with halter style tops. Instead go for a dress option that cinches in a bit at the waist and flares out at the bottom. Basically what you want to do is help create the shape you’re looking for.

A halter dress or clingy option will accentuate broader shoulders, a larger bust and a form fitting choice will draw attention to all the wrong places. So go with something with a V-Neck or a plunging neckline with a fuller skirt to even out your top and bottom. This is create the perfect shape while at the same time eliminated that top heavy look.

The Smart Phone

Now when it comes to you more rectangular ladies you’ll have a slew of options as well because our basic goal here is to increase your curvaceousness while drawing those eyes towards your bust and waist.

To add more fullness to the bust shoot for a dress with ruching, embellishments and beaded tops. This will create the look of a larger bust and add those are curves in the right places. Also dresses that cinch in at the waist such as an empire waist line or even a flared puffy skirt with a form fitting bodice will put those curves right where you want them.

Another easy tip to remember is to nab up dresses with patterns and prints galore because your body type can pull them off as easy as can be.

The Circle

If it seems like no matter what you do those annoying extra pounds head straight for your tummy, don’t fret because I have you covered.

This is a super common problems for tons of women and with a few tricks you can get looking and feeling like a million with ease. What we are gunning for here is elongating the look of your body, drawing those eyes right where we want them and that shape back into your swag.

So you’ll want to focus on slimming styles and for those of you with a larger bust you’ll definitely want to snatch up those plunging necklines which are sure to draw those eyes right up towards your face (close enough anyway!).

An A-Line dress with a deep V-Neck is a sure winner when it comes to this shape. Stay away from tons of patterns, prints and choices that cover all of your skin. Empire style choices also help to put that waist line where you want it while knowing the gradual flare will conceal your tummy, waist and hips.

Well there you have it girls! Follow those simple tips and you’ll be on your way to looking fabulous because now you’ll know how to choose a dress and pull it off like a professional. Now go get ’em!

Indian Garam Masala Recipe, The Authentic Stuff

If you love Indian dishes or want to start making some of your own you’ll need this recipe for an authentic Garam Masala. It’s not until you get into cooking some Indian recipes, do you realize the importance of knowing how to make authentic Indian Garam Masala.

I can personally remember it clear as can be, there I am with all my ingredients ready to rock in the kitchen, freshly printed off recipe from the internet and pumped to get whipping some Indian food. Trying to be all TV chef like I start measuring ingredients out into some little ramekins and as my eyes shoot down the list of stuff I need, there it is; Garam Masala. What the heck?!

Needless to say, the Indian chef fun for the night was then delayed for another day. That’s exactly what you don’t want to deal with when you’re ready to whip your next curry.

So we’ve put together this authentic recipe for you to use so you’ll never be stuck in a situation like that because it sucks!

Authentic Garam Masala Recipe Ingredients

  1. 4 Tablespoons of Coriander Seeds
  2. 1 Tablespoon of Cumin Seeds
  3. 1 Tablespoon of Black Pepper
  4. 1/4 Tablespoon of Cloves
  5. 1/4 Tablespoon of Cinnamon
  6. 1/4 Tablespoon of Nutmeg
  7. 1/4 Tablespoon of Bay Leaves
  8. 1/4 Tablespoon of Dry Ginger
  9. 1/4 Tablespoon of Cardamoms
  10. 1 Star Anise

Preparation

Now to make the Garam Masala it’s a two part process. First you’ll want to dump all these ingredients into a warm pan with nothing in it at all. There’s no need for oil or anything else, you’ll want to dry roast these spices slowly. Once they start kicking up that sweet scent of Indian goodness, it’s time to take them off the heat.

This stuff can burn fast so just warm and stir them around till it’s kicking up that funk. Now you can move on to step two which is grinding all this stuff up.

You can rock a mortar and pestle or toss it all into a coffee grinder. Whichever method you choose just make sure to grind it all up into a powder and there you have it! Your very own homemade and authentic Indian Garam Masala.

Take this recipe and multiply out the ingredients if you want to whip a huge batch of it up because it can store fine in a sealed container for months on end.

If you’re short on time you can always order up some Garam Masala and have it shipped right to your door.

10 Best Survival Food Items

When things get bad we will all need food for survival, this is obvious. But what Survival Food is best to keep on hand? I have come up with a list of the top 10 Survival Food Items IMO.

Of course you may want to add or subtract but this is a good basic list. We all have seen what happens when a disaster goes down and people are not prepared, panic. Even the most unaware people know that grocery stores only have about a 3 day supply of food.

So keeping even a small supply of (hidden) Survival Food for you and your family is a must. These items can be bought cheap, just pick up a couple of them each time you go shopping and soon you will have a nice little stockpile of Survival Food just in case the SHTF.

I compiled this list from various sources taking into consideration availability, price and shelf life, so please enjoy and leave me a comment if you have any additions.

10 Best Survival Food Items

  1. Dried Beans – IMO the best Survival Food out there. They are cheap, easy to store and provide a great supply of protein and nutrients. Any beans will work, pintos, black, red, white, or lentils. If stored properly in cool climate in a sealed container they will last for years.
  2. Rice – Big 10 pound bags of rice are cheap and readily available. Rice will store for years just like the beans, and provides an excellent source of much needed energy in the form of carbs. Make sure to not get instant.
  3. Peanut Butter – Can last up to 5 years in a cellar, is a great source of protein, fats, and carbs. Plus would bring a little joy in some bleak times. Also if it got really bad you may be able to barter with it.
  4. Salt – Another staple item cheap available everywhere, and is one of the best items to have on hand. Salt stores forever, can be used to cure food, season food, and is another barter item.
  5. Sugar – Like salt stores forever, can add much needed calories, keep kids quiet, and could be used as a barter item. Brown or white will both work.
  6. Dried Pastas – Cheap, versatile, and calorie dense. Kids love it and it is easy to store. You can’t it in bulk like rice, or beans but it is very good to have on hand.
  7. Canned Meats – A little more expensive but not by much. Not as important as the other staples if you can hunt. Tuna, chicken, ham, beef any will work and they all store for years.
  8. Vegetable Shortening – Calorie dense, although not appetizing to eat. Shortening has many uses for cooking, making biscuits etc. Should store cool and dry up to 3 years.
  9. Cornmeal – I prefer cornmeal to flour for a few reasons. It stays longer, and you can make tortillas, grits, and cornbread fairly easily. Great source of energy.
  10. Canned Veggies/Fruit – I put this one last because it is the least calories, and nutrients for the cost. I would stick with green veggies, and non-acidic fruit like pears or peaches. These will keep longer and make sure you rotate them into your food supply before they go bad. Best case scenario can your own in you have the ability.

I hope this list provides a good starting point for some of readers. It is not a definitive list by any means and like I mentioned please leave a comment with any suggestions.

Survival Shelters Guide

The world didn’t end in 2012, but that does not mean that you shouldn’t still prepare. Survival Shelters are something that everyone beginner to advanced should know how construct in case of emergency.

This skill is useful not only in alien invasion, but if you are stranded, get lost hiking, or God forbid anything worse. Of course constructing Survival Shelters will be different in every instance. Many factors would contribute to the type of Survival Shelters that you would be able to build.Climate, geographic location, tools available, whether you our your companions are injured etc.

I will be providing a link to a wonderful site that gives a run down of the different types of Survival Shelters, and the skills and tools needed. They have detailed instructions for the most basic of Survival Shelters, the simple lean-to,up to more advanced Survival Shelters.

Survival Shelters Will You Be Left In The Cold?

No matter what the circumstance you should always be prepared, you never want to get caught in a bad situation, with no food, no water, and no protection from the elements.I will be bringing our readers much more information on staying prepared, keeping a low profile, and being able to procure the items that you need to survive.

Also we will strive to be budget conscious when we do provide tips, you will not need to buy a $3000 dollar walking stick in order to survive trust us.

Nephilim: Did Giants Walk The Earth?

The Nephilim, ancient giants of biblical times, legend or reality?

As it was told in genesis they are believed to be the offspring of fallen angels and human women.

There are stories of giants told in the legends of many different cultures from around the globe. So this would suggest that there were fallen angels scattered across the land all mating with human women trying to perpetuate a new race.

Were the tales of these giants just that myths, or did giant men really walk this planet long before us? Nephilim are mentioned in the bible in genesis, and there is some speculation that they are what brought about the flood.

Genesis 6:4 (Original KJV):
There were giants in the earth in those days; and also after that,
when the sons of God came in unto the daughters of men, and
they bare children to them, the same became mighty men which
were of old, men of renown.

Being a hybrid of human and fallen angels, the Nephilim would have had tremendous size and power, think Goliath for example. Also it would be safe to say they would have been wicked in nature, having spawned from the fallen angels.

Perhaps this is why the flood occurred to wipe them off of the planet. Many different theories have been stated regarding the Nephilim, some say they were Satan’s attempt at populating the Earth. Others believe that instead of being demon angels they are perhaps evil aliens trying to take over the planet.

The Nephilim are also mentioned in the book of Enoch as “The Watchers”. Whichever theory you believe there has been some solid physical evidence to support giant men in ancient times.

During a road construction in the Euphrates Valley of south-east Turkey in the late 50s, many tombs containing the fossil remains of giants were uncovered. At the sites the leg bones were measured to be 120 cms (47.24 inches).

Joe Taylor, Director of Mt. Blanco Fossil Museum, was commissioned to sculpt the human femur. This Antediluvian, or pre-flood giant was estimated to be between 14-16 feet tall.


Other notable Nephilim fossil finds:

  1. 23-foot tall skeleton found in 1456 A.D. beside a river in Valence, France.
  2. A 25′ 6 ” skeleton found in 1613 A.D. near the castle of Chaumont in France. This was claimed to be a nearly complete find.
  3. A 9′ 8″ skeleton was excavated from a mound near Brewersville, Indiana (Indianapolis News, Nov 10, 1975).
  4. In 1833 soldiers digging at a pit for a powder magazine in Lompock Rancho, California, discovered a male skeleton 12 feet tall. The skeleton was surrounded by carved shells, stone axes, and blocks of porphyry covered with unintelligible symbols. The skeleton had double rows of upper and lower teeth.  These bones substantiated legends by the local Piute Indians regarding giants which they called Si-Te-Cahs.
  5. In Clearwater Minnesota, the skeletons of seven giants were found in mounds. These had receding foreheads and complete double sets of teeth.

I do find it strange and interesting that several of these skeletons had dual sets of upper and lower teeth, and were accompanied by strange symbols, and writing. I will have to look further into that.

Are they the Nephilim from the Bible? You decide for yourself.